
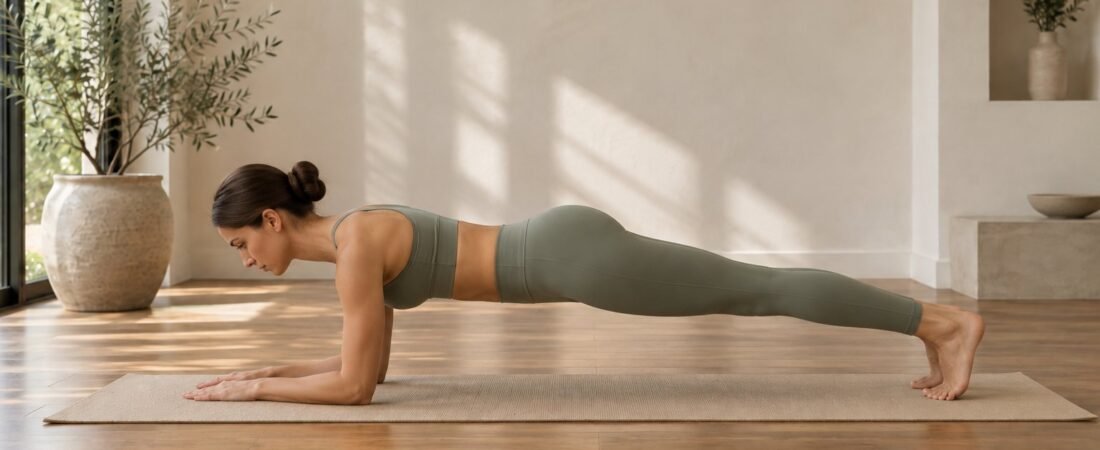
This is an ab workout at home that takes ten minutes, needs no equipment and uses five moves: the dead bug, the bird dog, the forearm plank, the side plank and the hollow hold. For each one you get how to do it, how to make it easier or harder, and the mistake that quietly cancels out the work. At the end there’s a short plan for fitting it into a normal week and a FAQ on how often to train, how long to hold a plank and what to do if your lower back complains.
One honest warning before we start: this workout will not flatten your stomach. Ab exercises build the muscles underneath; whether those muscles show is mostly a matter of body fat and genetics, and you cannot choose where your body takes fat from. The good news is that the things core training does deliver, a trunk that holds position under load and a back that tolerates daily life better, are worth having whether or not anything becomes visible.
What core training actually does, and what it doesn’t
The clearest test of the flat-stomach promise is a small but blunt trial. Researchers put 24 sedentary adults through seven abdominal exercises, two sets of ten repetitions, five days a week for six weeks, while keeping calorie intake the same. Compared with a control group, the training changed nothing measurable: not body weight, not body fat, not abdominal circumference. What it did change was endurance. By the end, the training group managed 47 curl-ups in a test where the control group managed 32.
That is the honest summary of ab training in one study: better at the job, not smaller around the middle. Fat loss, when someone wants it, comes from the whole picture of eating and overall activity, and it comes off the whole body in whatever order your genes decide.
Core strength is still worth the ten minutes. The CDC asks adults for muscle-strengthening activity on at least two days a week, covering all the major muscle groups, and it lists the abdomen as one of them, alongside legs, hips, back, chest, shoulders and arms. Most people never get there. The American College of Sports Medicine notes that fewer than 30% of U.S. adults meet the muscle-strengthening guidelines, and its 2026 fitness trends survey put “balance, flow and core strength” at number five on the list of what the industry sees growing.
There’s a useful signal from an unlikely place, too. When the U.S. Army revised its combat fitness test, it replaced the leg tuck event with the plank. The test an army uses to measure a trunk is a held position, not a count of sit-ups. That is the same logic behind every move below.
A quick word on the numbers in this post. The timings are a sensible starting point, not a prescription: they come from how these moves are normally programmed for beginners, not from a trial that compared them. The only hard numbers here are the ones with a link next to them. If you’re pregnant or recently postpartum, or you have back pain, a hernia or a diagnosed separation of the abdominal muscles, treat this as general information and get a physiotherapist or your doctor to pick your starting point instead.
The 10-minute ab workout at home, at a glance
| Move | What it trains | Per round | What most people get wrong |
|---|---|---|---|
| Dead bug | Keeping the spine still while the limbs move | 40 seconds | Letting the lower back lift off the floor |
| Bird dog | Resisting rotation; back and glutes | 40 seconds | Rushing, and twisting the hips open |
| Forearm plank | Holding a straight line under fatigue | 20–40 seconds | Chasing minutes instead of quality |
| Side plank | The sides of the trunk | 20–30 seconds each side | Letting the hips sag backwards |
| Hollow hold | The front of the trunk, under tension | 20–30 seconds | Starting with legs too low |
Two rounds of that list, with about 20 seconds of rest between moves, comes to roughly ten minutes, which is the whole ab workout at home. One round is a perfectly good day. Three rounds is a solid session if you have the time and the moves still look clean on the last one.
The dead bug teaches your core the only job it has
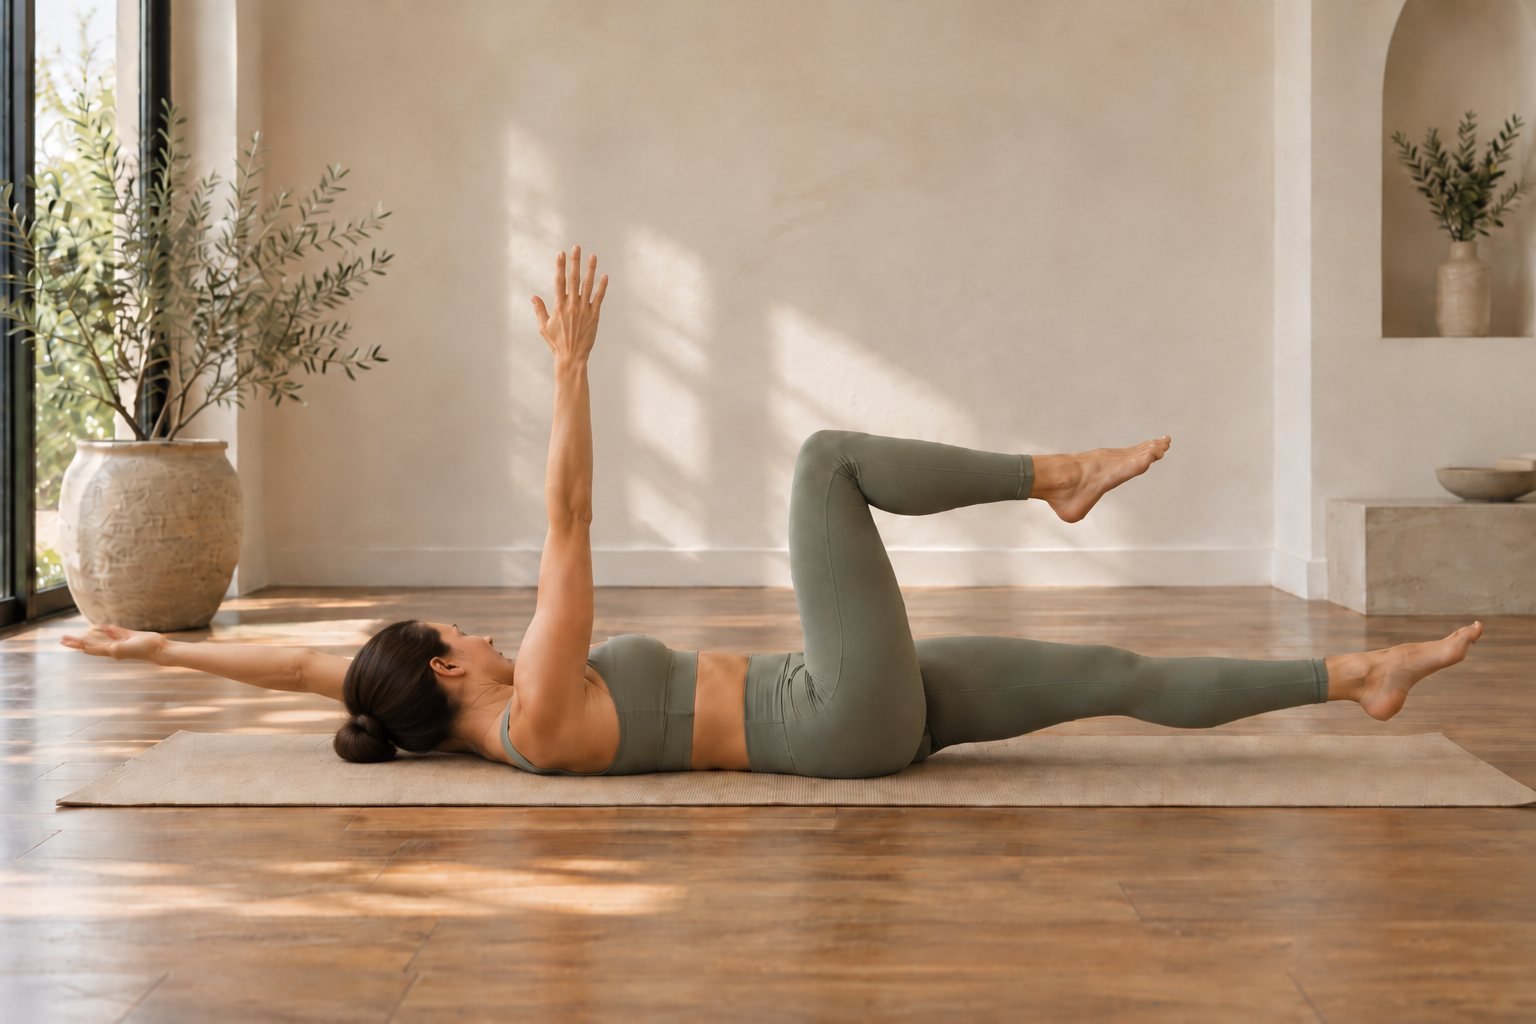
Start here, even if it looks too easy. The dead bug trains the thing a core is actually for: keeping your spine still while your arms and legs do something else. Carrying shopping, lifting a toddler, reaching into the back of the car are all versions of that. It’s also the gentlest move in this list on the lower back, because you’re lying on it the whole time.
How to do it
- Lie on your back with your arms pointed straight up at the ceiling and your knees bent over your hips, shins parallel to the floor.
- Press your lower back lightly into the floor so there’s no gap under it. Hold that pressure for the whole set; it’s the actual exercise.
- Breathe out and slowly lower your right arm overhead and straighten your left leg towards the floor, going only as low as you can without the gap appearing.
- Breathe in and return to the start. Repeat on the other side.
- Keep alternating, slowly, for 40 seconds. Four or five controlled repetitions per side beats twelve rushed ones.
Easier or harder
| Level | What to change |
|---|---|
| Easier | Move only the arms, or only the legs, and keep the other pair still |
| Standard | Opposite arm and leg together, lowering to a few inches off the floor |
| Harder | Slow each repetition to a five-count and pause at the bottom |
If your back lifts off the floor: stop lowering so far. The range where you can hold the position is the useful range, and it grows week by week. To feel what you’re aiming for, slide a hand under your lower back before you start; the goal is to keep gentle pressure on it the whole time.
The bird dog is where balance and back strength meet
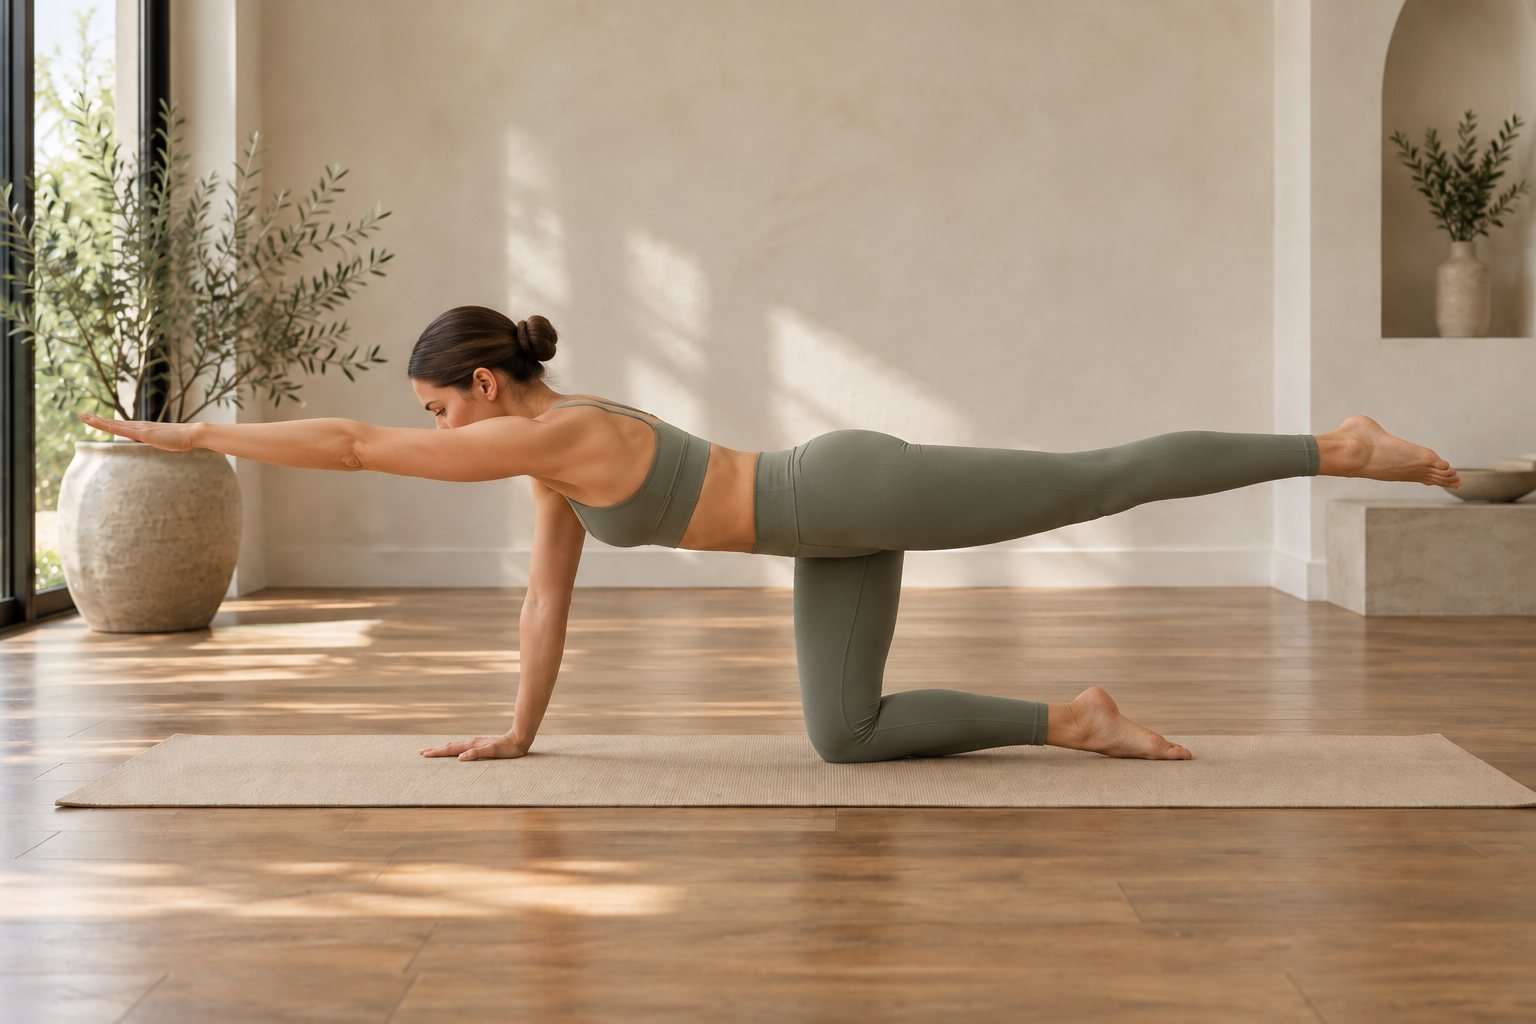
The bird dog looks like a stretch and behaves like a strength exercise. On all fours, extending the opposite arm and leg, your body wants to tip and twist, and stopping it is the work. It also brings in the muscles along the spine and the glutes, which is why it turns up so often in programmes for people with cranky lower backs.
How to do it
- Get on all fours with your hands under your shoulders and your knees under your hips. Look at the floor so your neck stays in line with your spine.
- Brace lightly, as if you were about to be poked in the stomach. Not a full clench, just enough to stiffen the middle.
- Reach your right arm forward and your left leg back until both are roughly level with your body. Keep both hip bones pointing at the floor.
- Hold for two or three seconds, then come back and switch sides.
- Alternate for 40 seconds.
Easier or harder
| Level | What to change |
|---|---|
| Easier | Extend one limb at a time, arm only or leg only |
| Standard | Opposite arm and leg, held for two or three seconds |
| Harder | After each extension, bring elbow and knee together under your body without putting them down |
The balance test: if you put a cup of water on your lower back, it shouldn’t spill. Most people fail that test by lifting the leg too high, which tips the pelvis and arches the back. Lower the leg until the hips are square again; that’s your height.
The forearm plank is about quality, not minutes
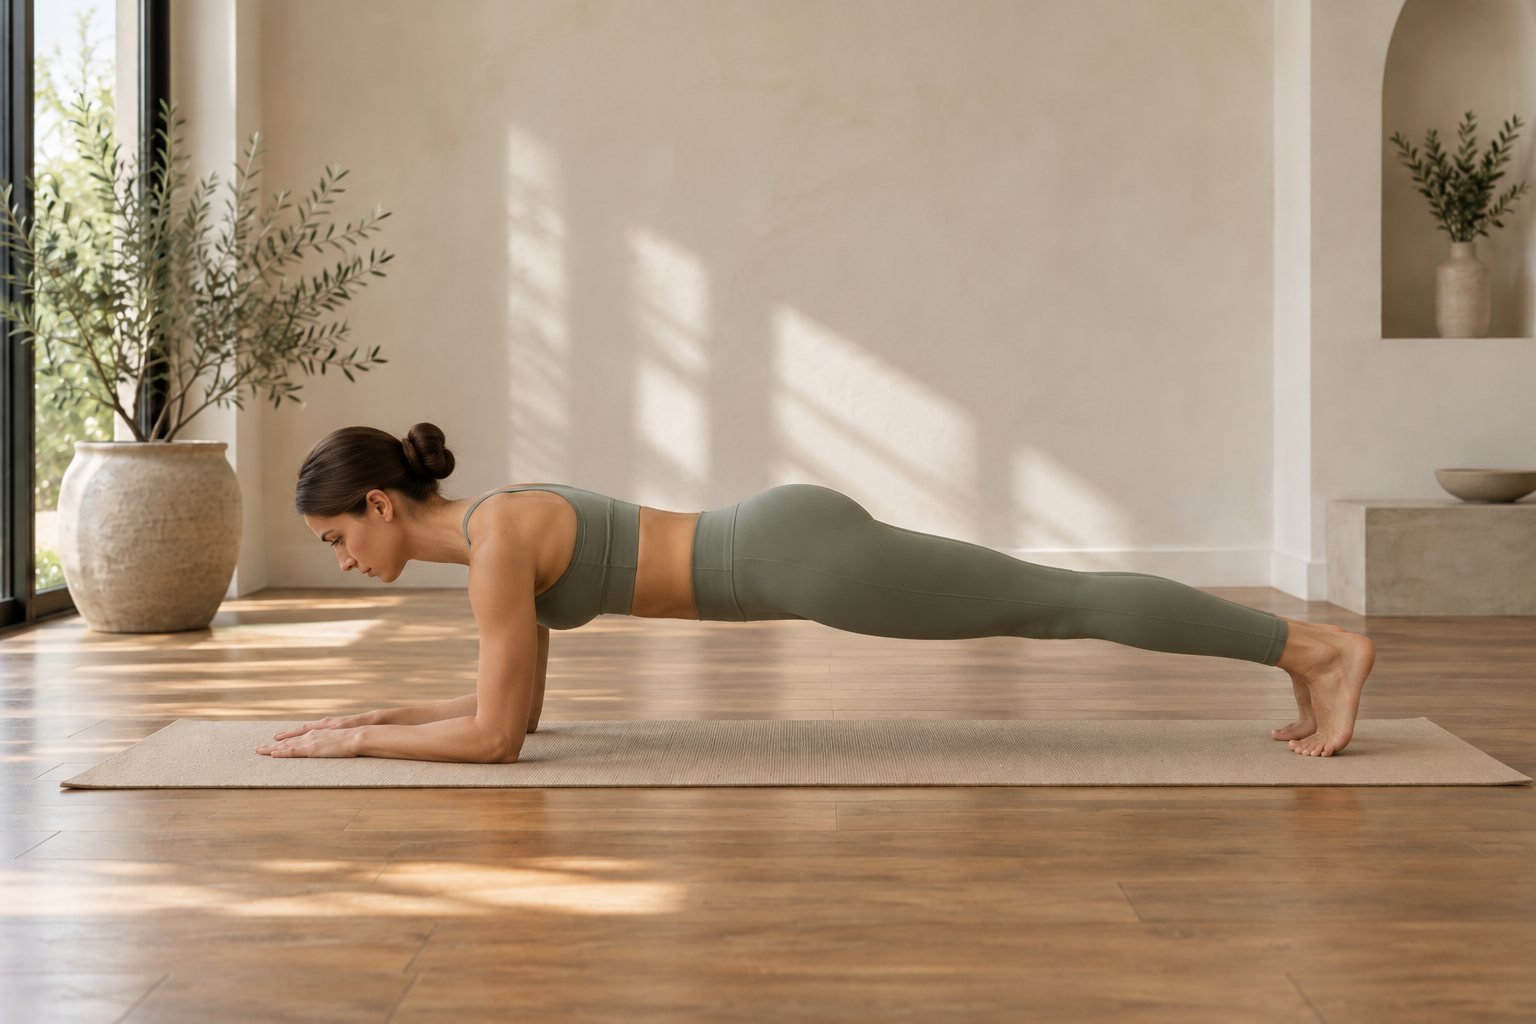
The plank became famous and then became a competition, which ruined it. A plank held for four minutes with a sagging back trains almost nothing except patience. Twenty seconds of a genuinely straight, fully braced line is a better exercise, and it’s the version worth building on.
How to do it
- Set your elbows under your shoulders, forearms flat, feet about hip-width apart.
- Lift your hips so your body makes one straight line from your ears to your heels. No dip, no peak.
- Squeeze your glutes and tuck your tailbone slightly under. This is the step that protects your lower back, and the one most people skip.
- Push the floor away so your upper back is slightly rounded rather than caved in between the shoulder blades.
- Breathe normally and hold for 20 to 40 seconds. Stop the moment the line breaks, even if your timer disagrees.
Easier or harder
| Level | What to change |
|---|---|
| Easier | Forearms on a sofa seat or a kitchen counter, body on an incline |
| Standard | Forearms and toes on the floor, 20–40 seconds |
| Harder | Lift one foot an inch off the floor for five seconds, then swap |
The honest check: film ten seconds of your plank from the side with your phone propped against a wall. Nearly everyone is surprised the first time. If the hips are high, you’re resting; if they’re low, you’re hanging off your lower back. Fix it, and the same hold suddenly feels twice as hard.
The side plank covers the part most routines forget
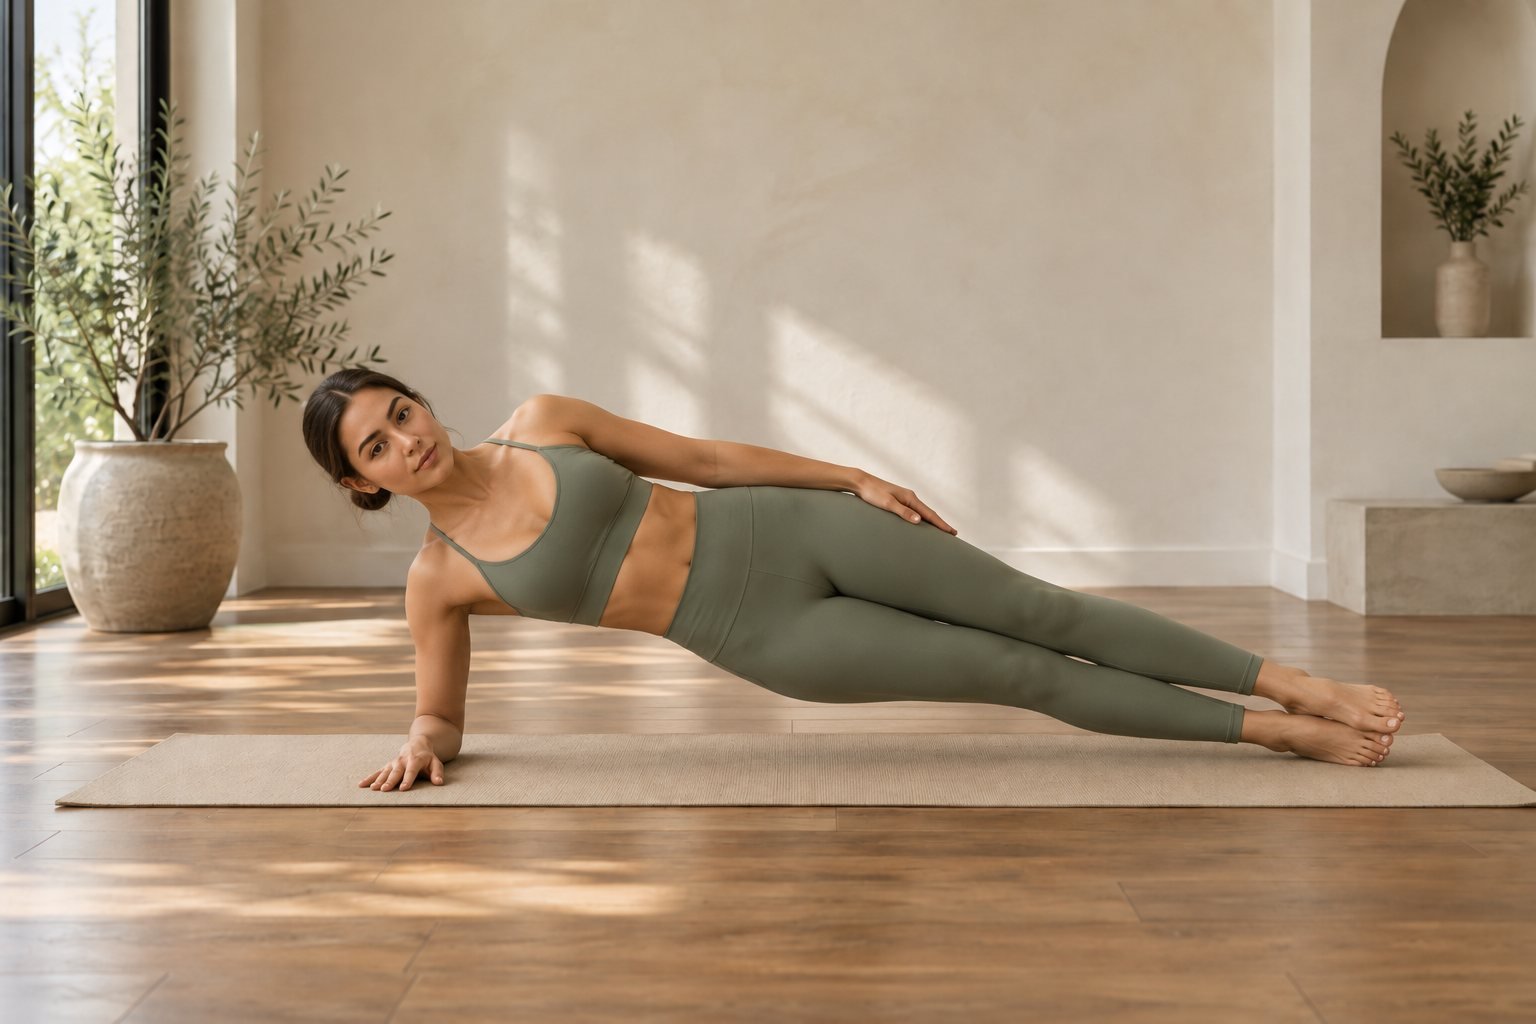
Crunch-based routines train the front of the trunk and ignore the sides, which is where most of the resistance to sideways bending and twisting comes from. The side plank fixes that in one move, and the knees-down version is genuinely useful rather than a consolation prize.
How to do it
- Lie on your side with your elbow under your shoulder and your legs stacked, knees bent at about 90 degrees for the easier version.
- Lift your hips until your body makes a straight line from your head to your knees, or to your feet in the full version.
- Push your bottom shoulder away from your ear so you’re not sinking into the joint.
- Hold for 20 to 30 seconds, then do the other side. Both sides, every round, even if one is clearly weaker.
Easier or harder
| Level | What to change |
|---|---|
| Easier | Knees bent, weight through the bottom knee |
| Standard | Legs straight, feet stacked or staggered front and back |
| Harder | Lift the top leg a few inches and hold it there |
About the weaker side: almost everyone has one. Train both the same way and let the gap close on its own over a few weeks. A side that gives out ten seconds early isn’t a problem to solve with extra sets; it’s just information about where you are.
The hollow hold is the one that finally feels like ab work
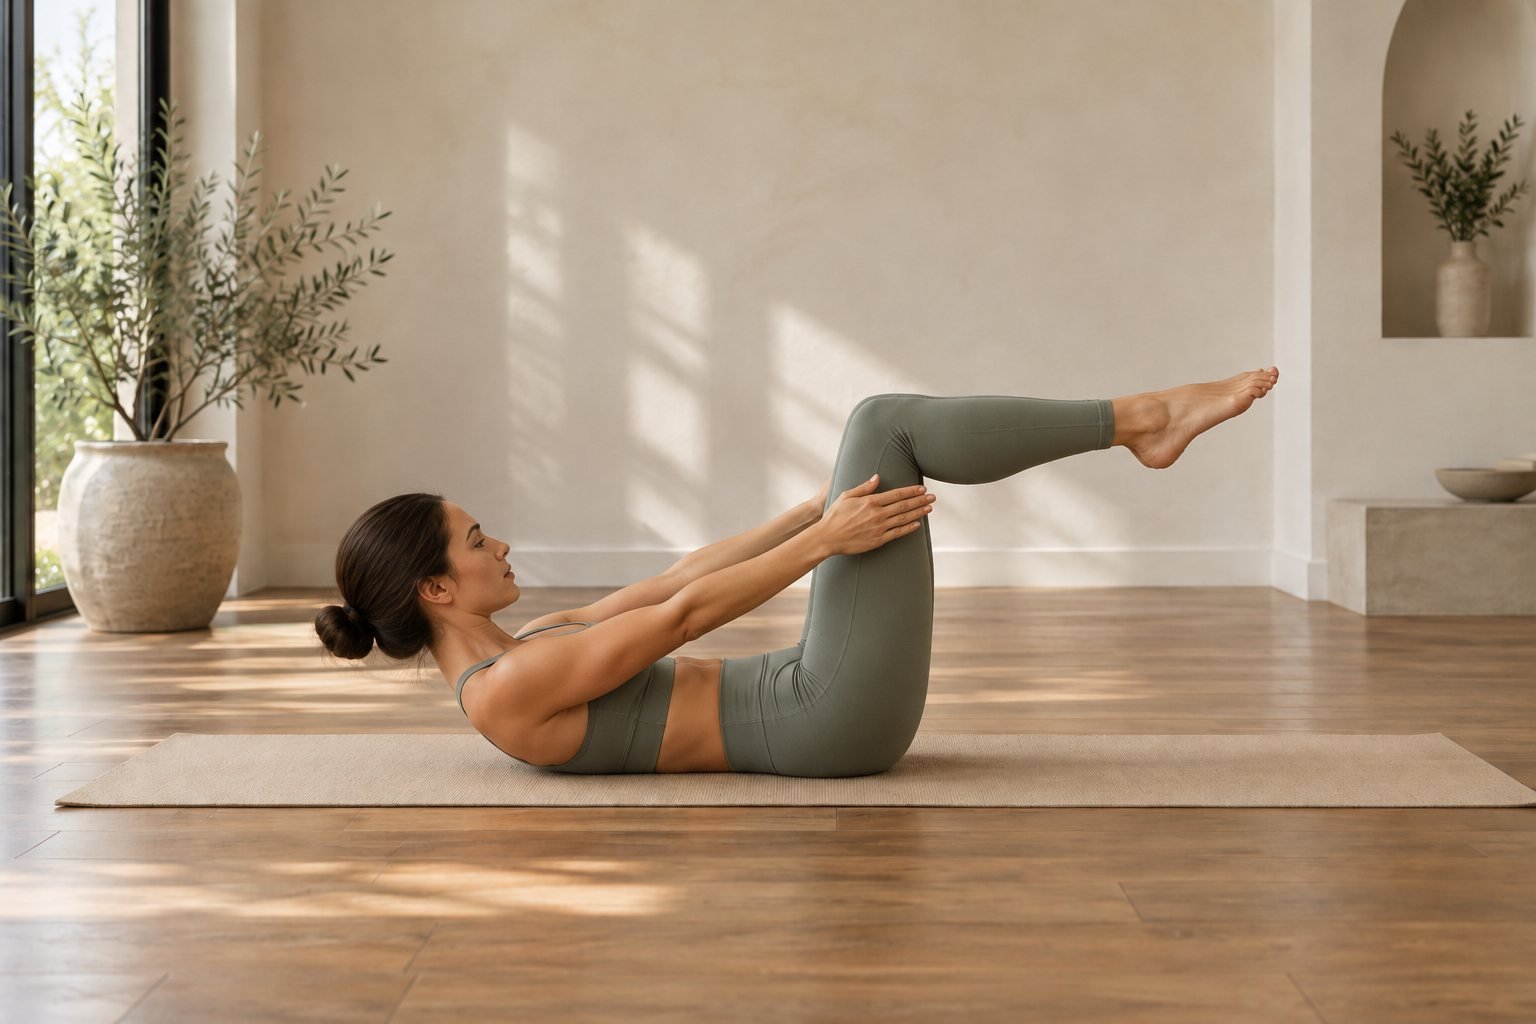
If the first four moves feel suspiciously calm, this is the one that delivers the burn people expect from an ab session. It’s borrowed from gymnastics: a shallow banana shape, held, with the lower back pinned to the floor. It’s also the easiest move here to do badly, so start short.
How to do it
- Lie on your back, knees bent, feet flat, arms by your sides.
- Press your lower back into the floor and keep that pressure. Nothing else matters if this goes.
- Lift your head, shoulders and feet a few inches off the floor, keeping the knees bent to start with.
- Reach your fingertips towards your feet and hold for 20 to 30 seconds, breathing in short, shallow breaths.
- Lower everything together, rest, and go again rather than fighting a position that has already collapsed.
Easier or harder
| Level | What to change |
|---|---|
| Easier | Knees bent and feet on the floor, lift only head and shoulders |
| Standard | Knees bent at 90 degrees, feet and shoulders off the floor |
| Harder | Straighten the legs and lower them closer to the floor, arms overhead |
The rule that keeps this safe: the lower the legs, the harder your back has to work to stay flat. The moment a gap opens under your lower back, raise the legs higher. Legs at 45 degrees with a flat back is a better exercise than legs at 10 degrees with an arched one.
How to fit it into a real week
Twice a week is the target, because that’s what the CDC asks for and because a core session two days apart leaves time to recover. Ten minutes on a Tuesday and a Saturday is a complete programme at this stage; there’s no version of this where a sixth session beats a consistent second one.
Attach the workout to something that already happens. The reliable pattern is a trigger you can’t skip: after the morning coffee, before the evening shower, during the ad break of the thing you watch anyway. If you’ve read my post on offline hobbies and a gentle 7-day plan, it’s the same mechanic, applied to ten minutes on a mat.
Progress is boring on purpose. Keep the same five moves for three or four weeks and change only one variable: a few seconds longer, a slightly harder version of one move, or one extra round. When a session no longer feels like anything, move one move up a level rather than adding three new exercises. An ab workout at home works because it’s short enough to actually happen, and the quickest way to break it is to let it grow into half an hour.
Questions people ask about an ab workout at home
How often should I train my abs?
Two or three times a week is plenty, with a day in between. The abdominal muscles recover like any others, and ten focused minutes twice a week beats a daily routine you quietly abandon in week three. The CDC’s floor for strength work of any kind is two days a week.
Will this give me visible abs?
It will build the muscle. Whether it shows depends on how much fat sits over it, which is decided by overall eating and activity and by genetics, not by the number of crunches. In the trial above, six weeks of abdominal training five days a week changed abdominal fat by nothing at all while measurably improving endurance. Train for the strength and treat any visual change as a side effect.
How long should I hold a plank?
Long enough that the last five seconds are hard, short enough that the line stays straight. For most people starting out that’s 20 to 40 seconds. Once you can hold a clean minute, make the move harder rather than the hold longer: lift a foot, narrow your stance, or move to a side plank.
My lower back hurts during ab exercises. What now?
Stop the move that hurts. Most of the time the cause is a lower back arching away from the floor, so shorten the lever: bend the knees, raise the legs higher, or lower only one limb at a time. If pain persists outside training, or it radiates down a leg, see a doctor or a physiotherapist rather than working around it.
Do I need any equipment?
No. A mat or a folded towel makes the floor work kinder on your elbows and tailbone, and that’s the whole list. Weights, wheels and sliders are options later, once the five moves above are clean at the hardest level.
Are crunches and sit-ups useless then?
Not useless, just overrated as a whole programme. They train bending the spine over and over, which is one function among several and the one most likely to irritate a sensitive back. Held and anti-movement positions cover more ground, which is why the Army’s fitness test now scores a plank.
Ten minutes, five moves, twice a week. Start at the level where the position holds, keep your lower back where it belongs, and let the hold times creep up on their own. The workout won’t change what your stomach looks like, but within a few weeks you’ll notice the thing it does change: carrying, lifting and standing up from the floor stop asking quite so much of your back.